

Setting up SOLIDWORKS Electrical correctly the first time saves you from license conflicts, missing components, and re-installation headaches down the line. Whether you’re rolling it out for a single designer or an entire electrical team, this guide walks through the installation from prerequisites to first launch.
These steps also help mechanical and electrical teams stay aligned from day one. The Electrical Client and Electrical Server components you choose here directly determine how schematic, 3D routing, and collaborative library data work together across your team.
This guide covers a standalone installation, where all program components sit on the same computer. If your setup uses a client-server configuration instead, with a dedicated server hosting the program data, Collaborative Server, and SQL Server while each user’s machine runs only the client application, the steps differ. Reach out to our Technical Team for a walkthrough of the client-server setup that matches your environment.
Prepare Before You Install
- Check that your computer meets the minimum SOLIDWORKS system requirements.
- Verify that your graphics card and driver are on the certified list.
- Keep at least 15% free disk space after installation.
- If upgrading, back up your Toolbox library, Design Library, templates, and PDM/data management vault before starting.
Tip: If you’re upgrading from an earlier version, archive your environment from within SOLIDWORKS Electrical first. It packages all your program data, projects, components, and symbols into one compressed file, and it’s worth starting overnight since a full archive can take a few hours.
You can also check our page on How to Archive Environment in Solidworks Electrical
Get Your Installation Media
Download the SOLIDWORKS Installation Manager to install SOLIDWORKS directly, or download the complete installation files (around 16 GB) if you are installing on multiple machines.
For detailed steps on downloading SOLIDWORKS, see our complete guide: Get Started with SOLIDWORKS: Download Instructions Inside
Confirm Your Licensing and Configuration Requirements
SOLIDWORKS Electrical works with either a standalone or a network license, and that’s separate from whether your installation itself is standalone or client-server. This guide covers a standalone install with a standalone license.
SOLIDWORKS Electrical 2026 requires SQL Server 2022 or newer, with SQL Server 2022 Express automatically included during a first-time installation. If you’re installing SOLIDWORKS Electrical 3D, ensure SOLIDWORKS is installed with the same version and Service Pack to ensure compatibility between both applications.
Tip: Make sure everyone on your team, including customers and vendors you exchange files with, stays on the same version. Older releases of SOLIDWORKS Electrical can’t open files saved from a newer one.
Step 1: Launch Setup and Choose Installation Type
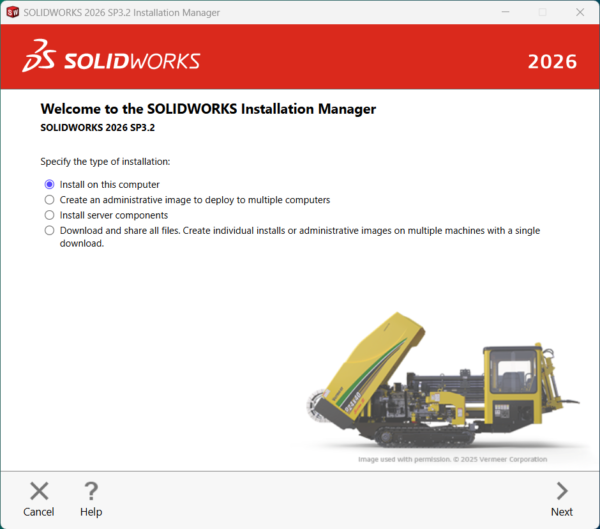
Log in to the computer as an administrator. Locate your installation media and run setup.exe. On the Welcome screen, choose Install on this computer and click Next.
Step 2: Enter Your Serial Number
You’ll land on the Serial Number screen: enter your SOLIDWORKS Electrical serial number, or skip it if your SOLIDWORKS serial number already covers Electrical. Only fill in a separate SOLIDWORKS Electrical 3D field if you hold a distinct license for it.
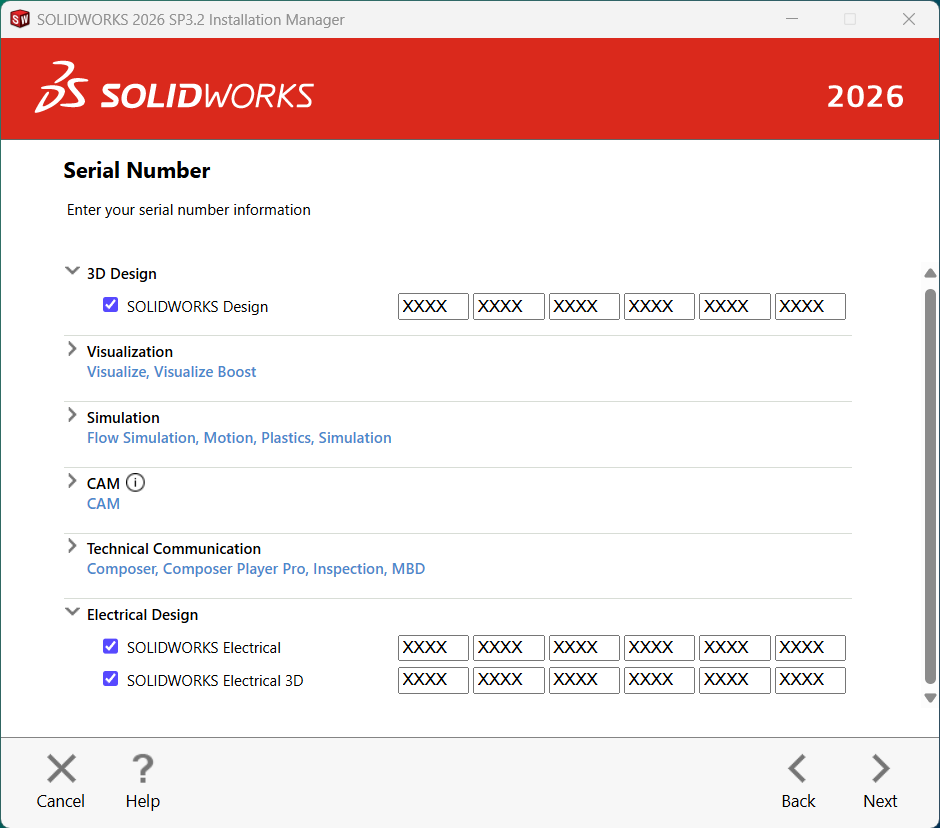
The installer then checks your serial number and scans for any existing SOLIDWORKS or SOLIDWORKS Electrical installations. Read through any warnings it raises before moving on.
Step 3: Select Your Products
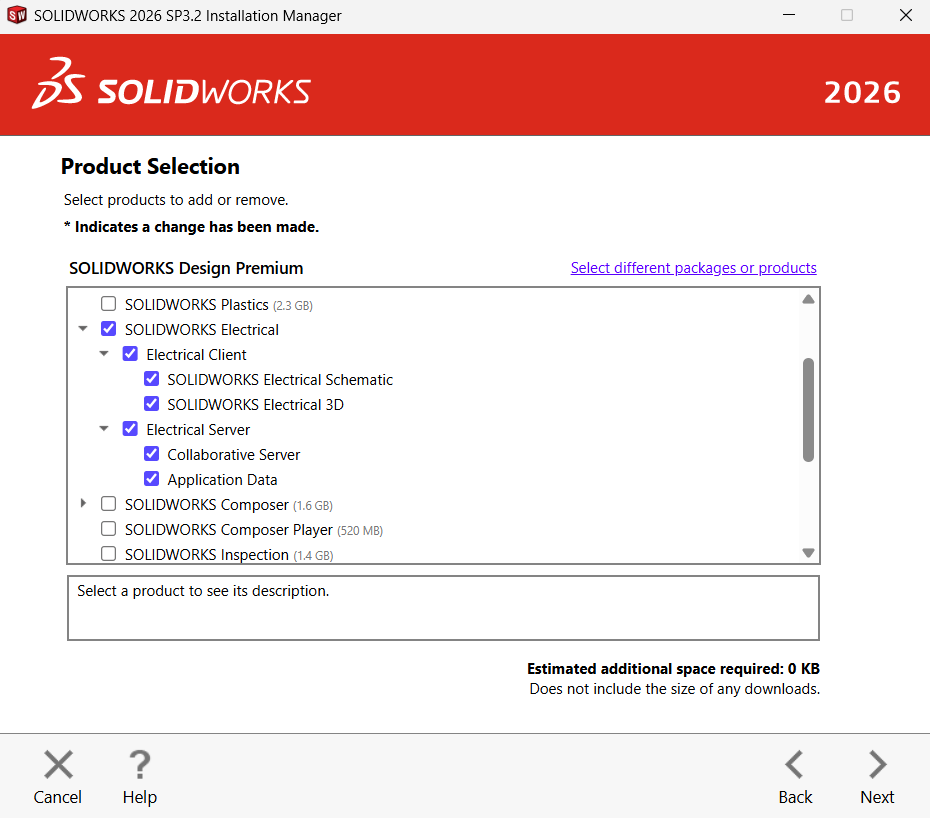
On the Product Selection screen, scroll down and make sure SOLIDWORKS Electrical is checked, then review the components nested underneath it. SOLIDWORKS Electrical Schematic is the 2D design application and should be on. SOLIDWORKS Electrical 3D is the add-in for full SOLIDWORKS and only appears if your license includes it. For a standalone installation, both Collaborative Server and Application Data should be checked too: Collaborative Server handles communication with the SQL server, and Application Data carries the SQL server plus your program data (projects, symbols, manufacturer parts, templates).
Step 4: Set Your Electrical Options
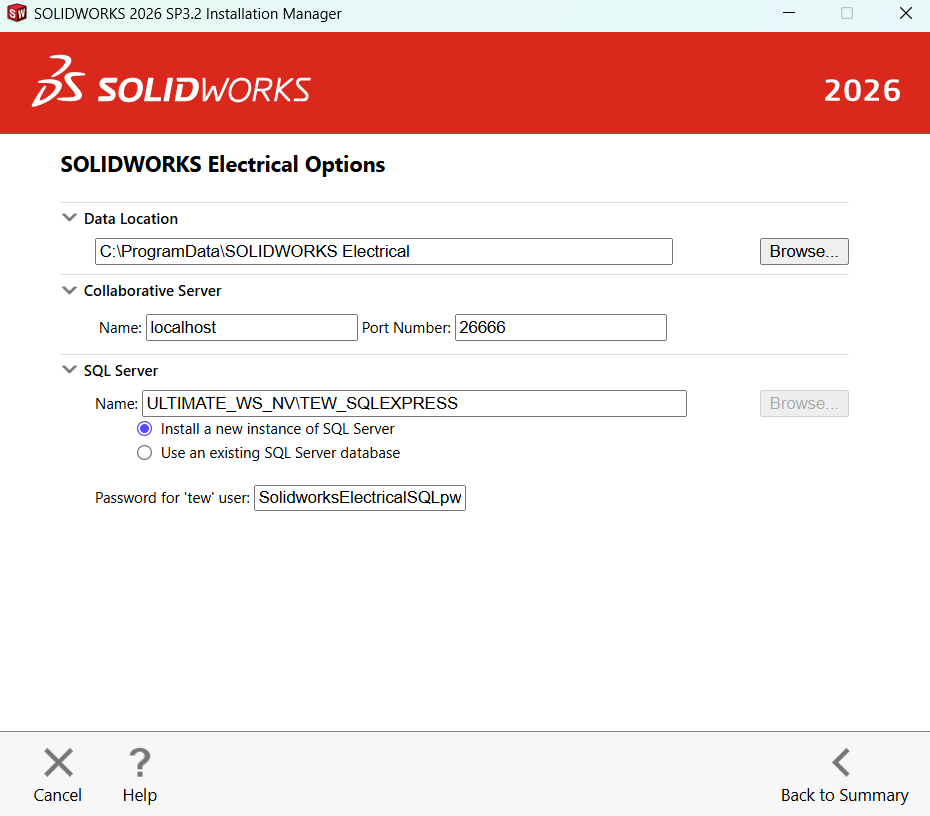
Back on the Summary screen, click Change next to Electrical Options. Data Location sets the folder that will hold your program data, defaulting to C:ProgramDataSOLIDWORKS Electrical. Collaborative Server sets the machine name and port for that service, defaulting to localhost and 26666, and should stay on those defaults for a standalone setup. SQL Server names the instance that will host your Electrical databases; for a fresh standalone install, choose to install a new SQL Server instance and keep the default localhost name and password. Unless you have a specific reason to change them, the defaults here are the right call
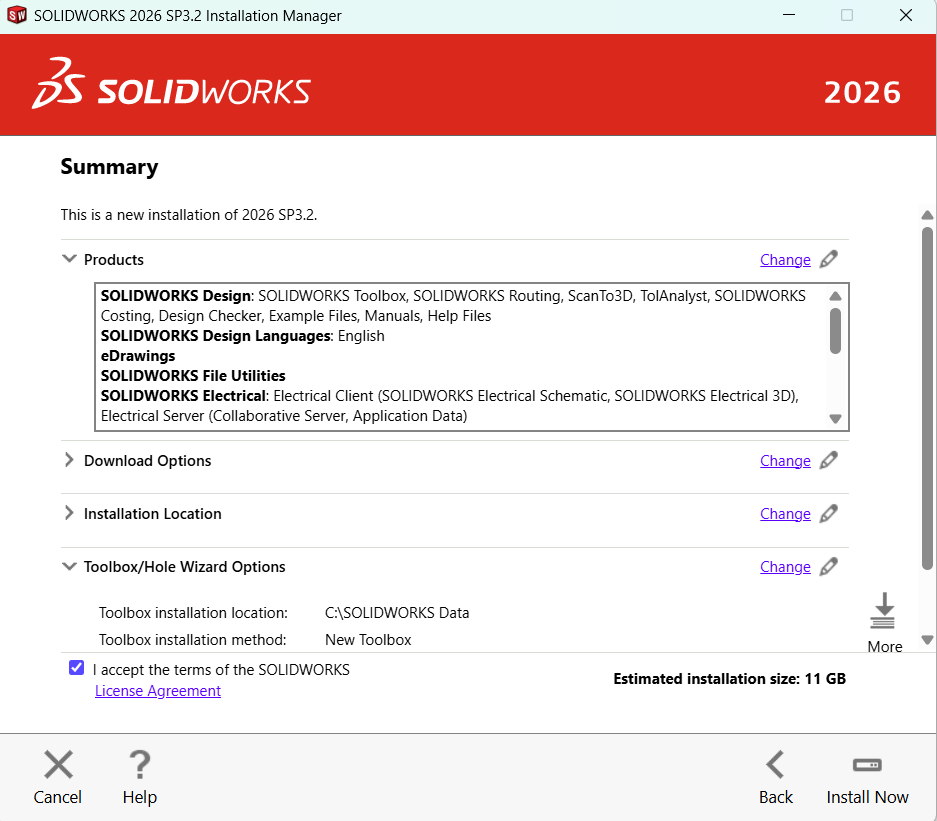
Step 5: Review the Summary and Install
Look over the Summary screen one more time to confirm your product selections and options are correct. Accept the license agreement, then click Install Now to begin. This step kicks off the actual file copy and configuration, so it’s your last chance to catch a wrong setting before it’s applied.
The first time you open SOLIDWORKS Electrical, you may be prompted to activate your license (if you’re on standalone licensing) and to accept the license agreement again. You’ll then be walked through a program data update wizard. Complete that, and you’re ready to start working.
Benefit: Catching a misconfigured data location or SQL Server setting now, before real project data is created against it, saves you from a much harder migration later.
Wrapping Up
That’s the complete process for installing SOLIDWORKS Electrical 2026—from preparing your system and downloading the required installation files to completing the installation and initial configuration. With SOLIDWORKS Electrical 2026 successfully installed, you’re now ready to create, manage, and develop your electrical designs with a fresh and optimized environment.
Contributor: Naveen Kumar Ravi | Elite Application Engineer
