
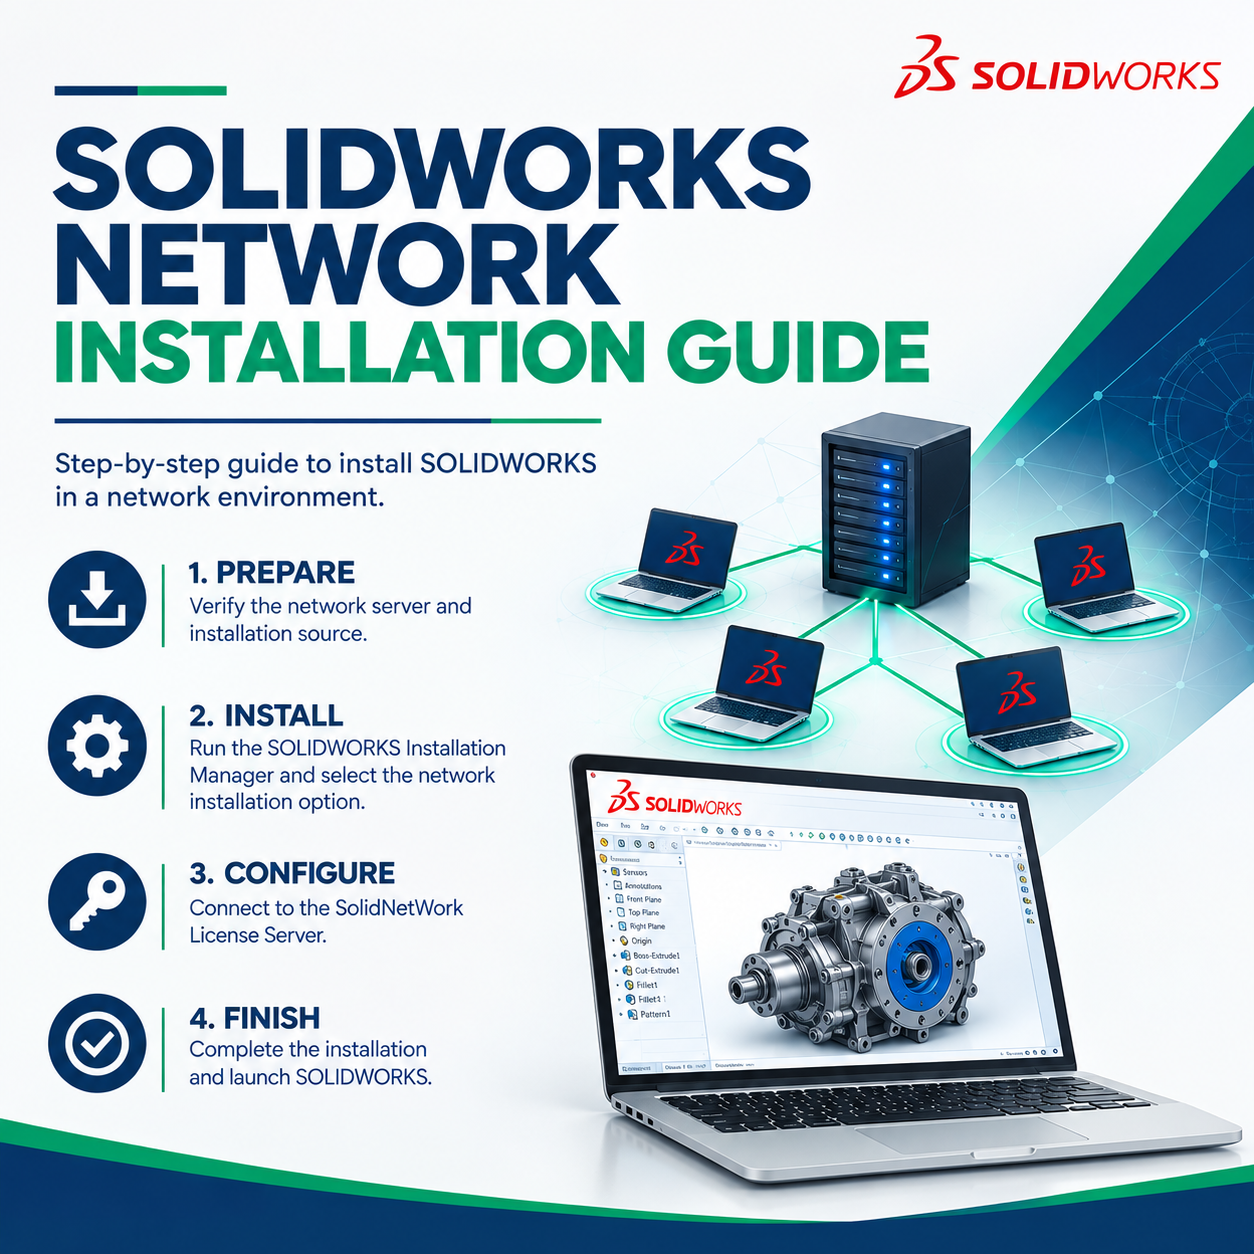
This guide provides an overview of how to install and configure the SolidNetWork License (SNL) Manager, which enables organizations to manage and distribute SOLIDWORKS network licenses across multiple client computers.
With floating network licensing, multiple users can share a pool of available licenses without requiring a dedicated license for every user. When a client computer launches a network-licensed SOLIDWORKS product, a license is automatically checked out from the SNL Manager. Once the application is closed, the license is released back to the network and becomes available for another user.
Prerequisites
- You will need the SOLIDWORKS Network Serial Number to configure the SolidNetWork License (SNL) Manager. These serial numbers typically begin with 9010 or 0010.
- Multiple SOLIDWORKS network serial numbers can be added and managed through the same SNL Manager, allowing licenses from different products or subscriptions to be administered from a single license server.
- Admin access and privileges to the server or machine where the SNL will be installed.
- SOLIDWORKS installation media, which can be downloaded from the SOLIDWORKS downloads site.
Note: The SolidNetWork License Manager version MUST be equal to or newer than the SOLIDWORKS version installed on client/local systems.
Installation Detailed Steps
1.Navigate to the downloaded SolidWorksSetup.exe and choose ‘Run as Administrator. The SOLIDWORKS installation manager will launch automatically.
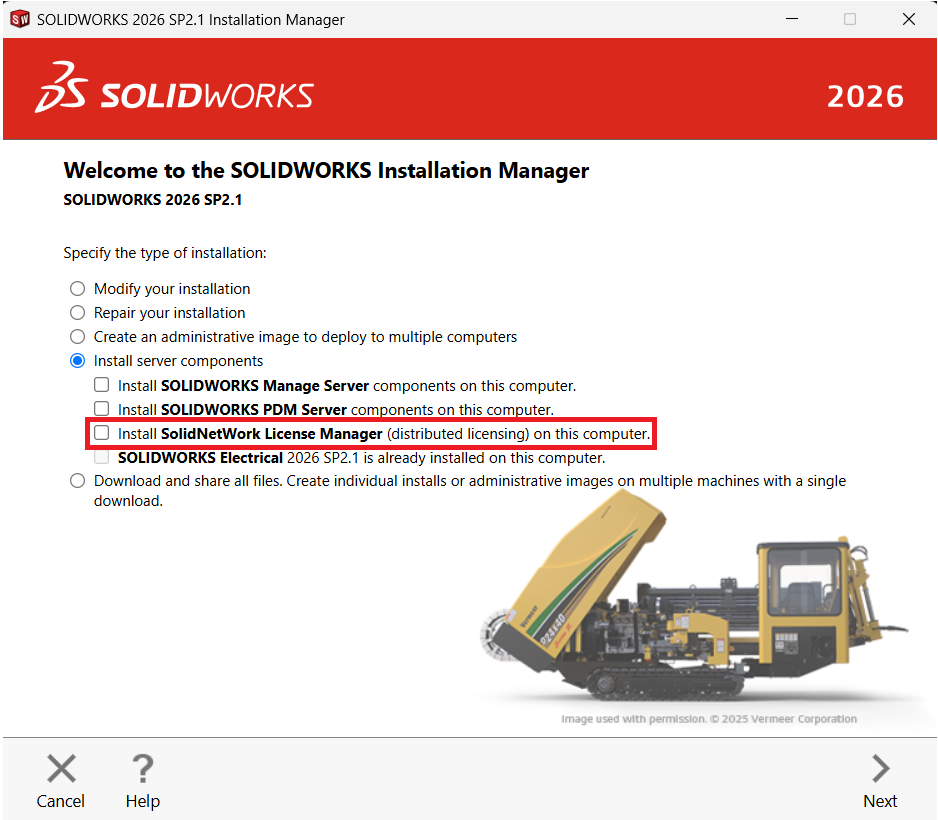
2.On the welcome screen, under Server Products, choose ‘Install SolidNetWork License Manager on this computer.’
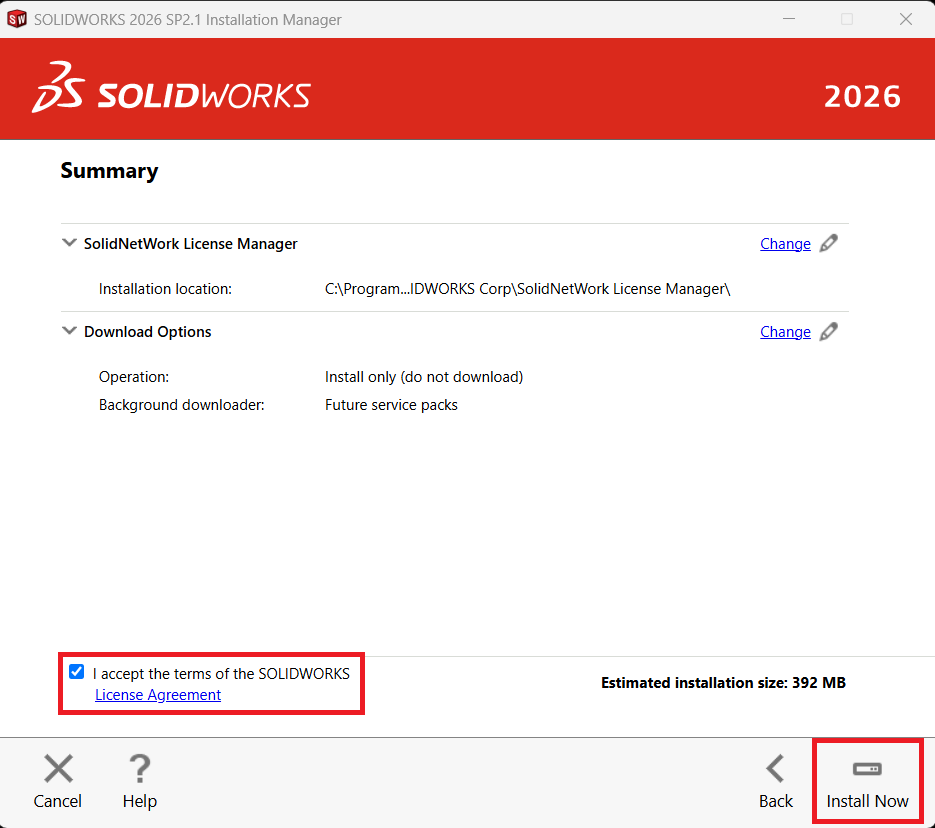
3.Verify the SolidNetWork License manager installation location and Download Options. We recommend leaving the locations set as default, though you can select the Change icons next to each category to modify the locations.
Default installation location:
C:\Program Files (x86)\SOLIDWORKS Corp\SolidNetWork License Manager
Default download location:
C:\Users\<username>\Documents\SOLIDWORKS Downloads
Accept the terms of the SOLIDWORKS license agreement and then click ‘Download and Install’.
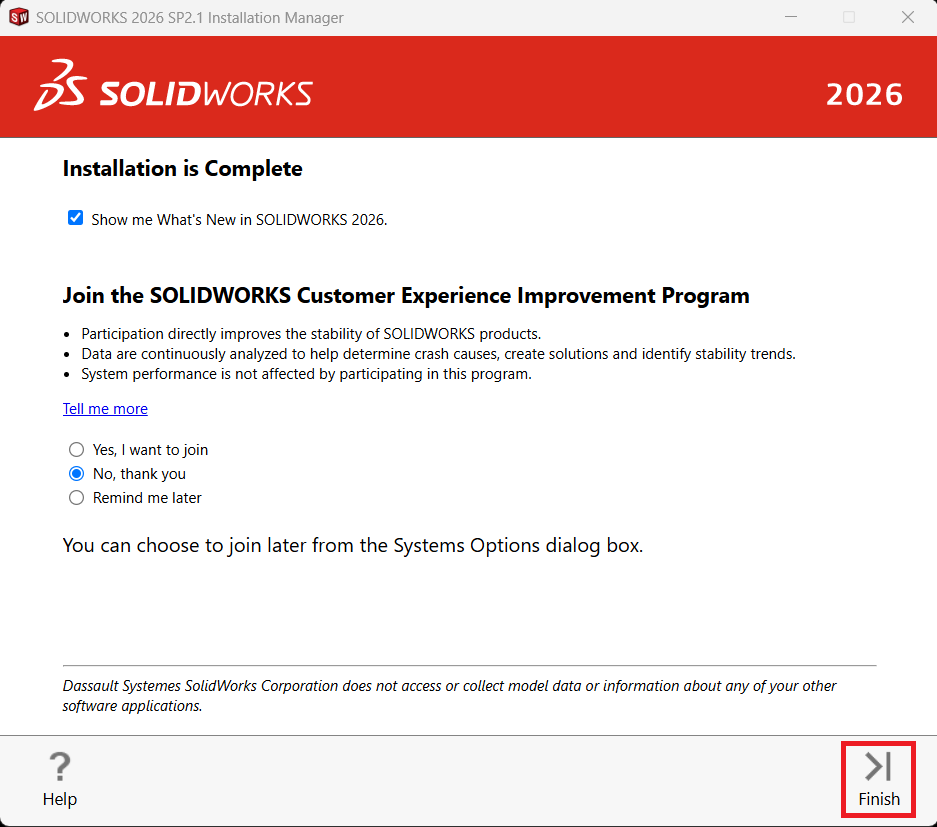
4.Once the installation is complete, select Finish to close the installation manager.
5.In the Windows app list, navigate to SOLIDWORKS Tools folder and launch SolidNetWork License Manager Server Editon. Alternatively, you can simply search Windows start for ‘solidnetwork license’, and Windows should return the license manager in the top results.
6.The system will prompt a message that licenses do not exist with a choice to activate now. Choose ‘Yes.’
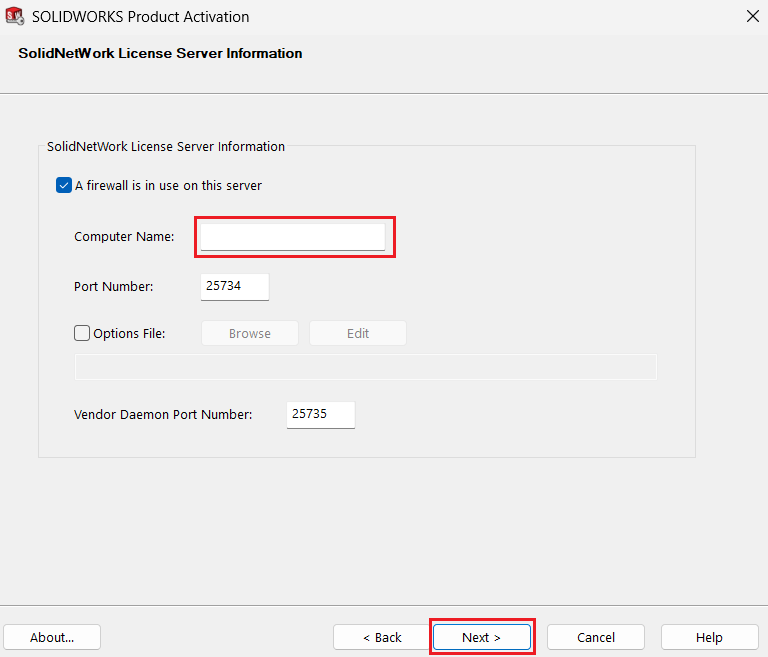
7.Review the SolidNetWork License Server Information and click ‘Next.’ If a firewall is in use, add the required communication port rules for SolidNetWork License manager (25734, 25735).
8.Enter your network serial number(s). Multiple serial numbers can be entered in list form or by separating them by semicolons (;). Click OK once the numbers have been entered.
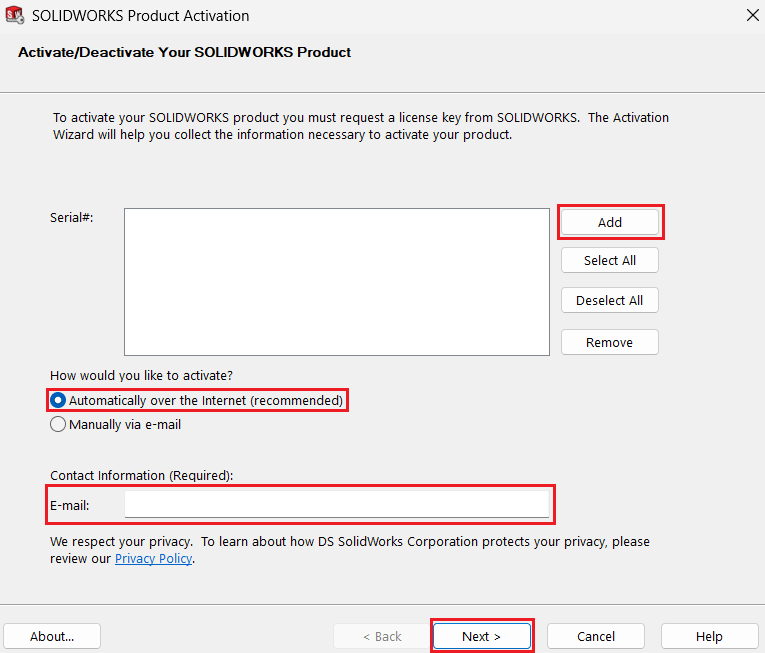
9.Verify the information is correct and enter your email address. The email address is not linked to the serial numbers. It is only required to track who activated the serial numbers at that time. Click Next to activate.
10.An activation status window will display for each serial number entered. Let the windows open, process, and close without interruption. Each window should only take a few seconds to complete.
11.Once the activations are complete, a summary screen will display. Click Finish to complete the activation process and return to the SolidNetWork License Manager.
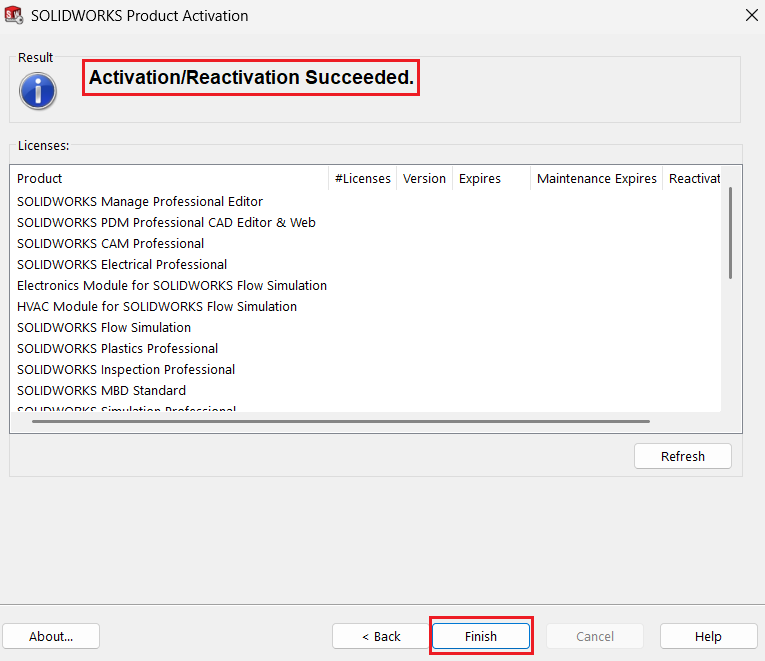
12.The SolidNetWork License Manager installation is now complete and ready to distribute licenses to clients installed using the same network serial number and connected to the same network as SNL.
Contributor: Naushad Ali Azim, SOLIDWORKS Elite Application Engineer, brings over a decade of experience in the SOLIDWORKS Partner Network, helping clients optimize CAD workflows and get the most from their SOLIDWORKS solutions.
