
In most cases, the SOLIDWORKS Installation Manager can successfully repair, modify, or upgrade an existing installation without requiring a complete removal of the software. However, in certain situations, performing a clean uninstall may be necessary.
A clean uninstall completely removes SOLIDWORKS and its associated components from your system. This process is recommended when:
- Resolving persistent installation or upgrade issues that cannot be fixed with a repair.
- Removing corrupted or incomplete SOLIDWORKS installations.
- Preparing the computer for a fresh installation of SOLIDWORKS.
- Repurposing a computer by removing all SOLIDWORKS products and related components.
Because this procedure permanently removes SOLIDWORKS and its associated files, folders, and registry entries, it should only be performed when necessary. Follow the instructions in this guide carefully to ensure the software is completely removed before reinstalling or repurposing the system.
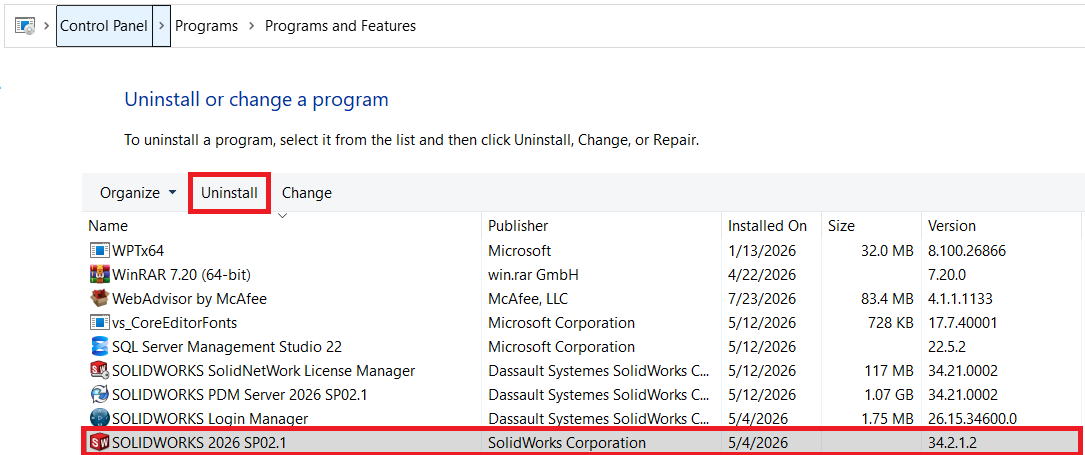
1.Open Programs and Features from the Windows Control Panel
Select the SOLIDWORKS application you want to uninstall and click Uninstall. When the SOLIDWORKS Installation Manager launches, a Windows reboot prompt will be displayed. Click OK to proceed with the uninstallation.
2. Chose SOLIDWORKS products
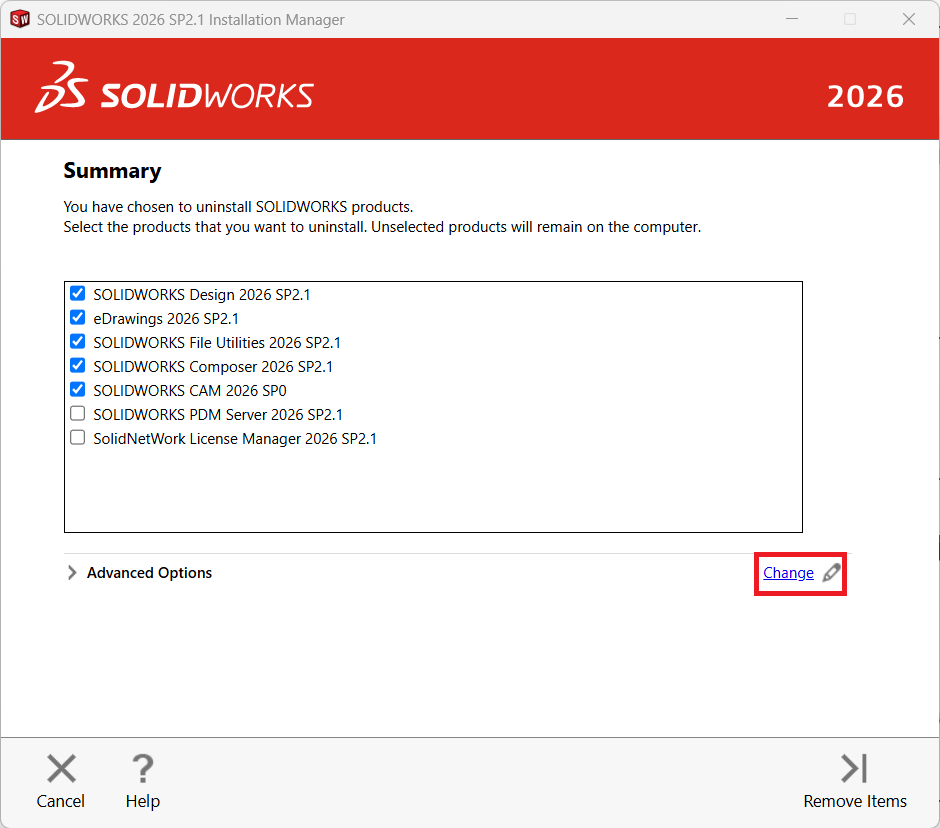
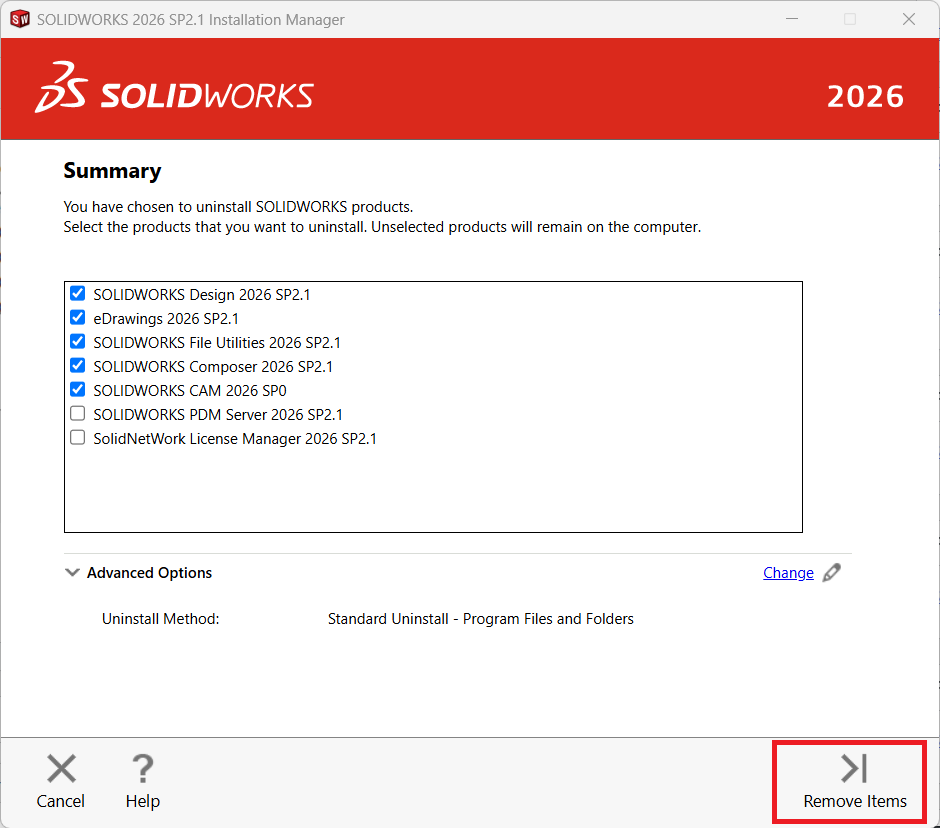
Select the checkboxes for the SOLIDWORKS products you want to uninstall. Then, under Advanced Options at the bottom of the Installation Manager window, click Change.
3.Select items to uninstall
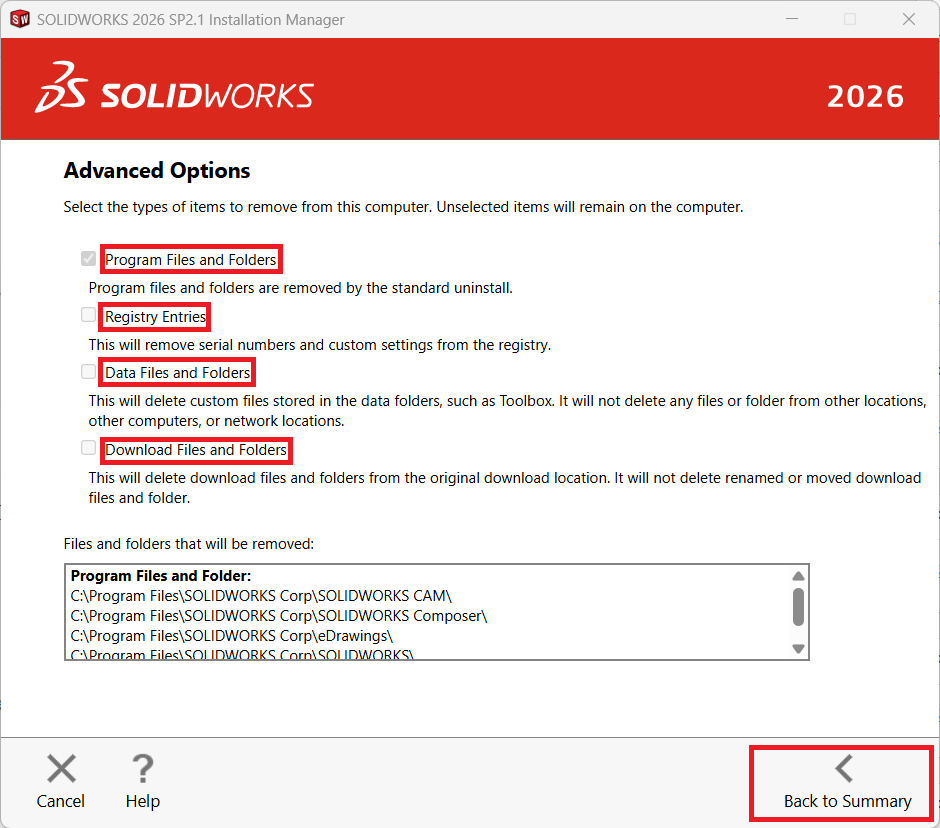
Under Advanced Options, select all of the following for removal:
- Program Files and Folders
- Registry Entries
- Data and File Folders
- Download Files and Folders
Then, click Back to Summary to return to the Installation Manager.
4.Complete uninstall
Click Remove Items to Continue.
You will be prompted that a reboot may be necessary. Click Yes to Continue.
SOLIDWORKS Installation Manager will alert you when the uninstall process is complete. Click OK.
5.Remove any Registry Locations that Remain
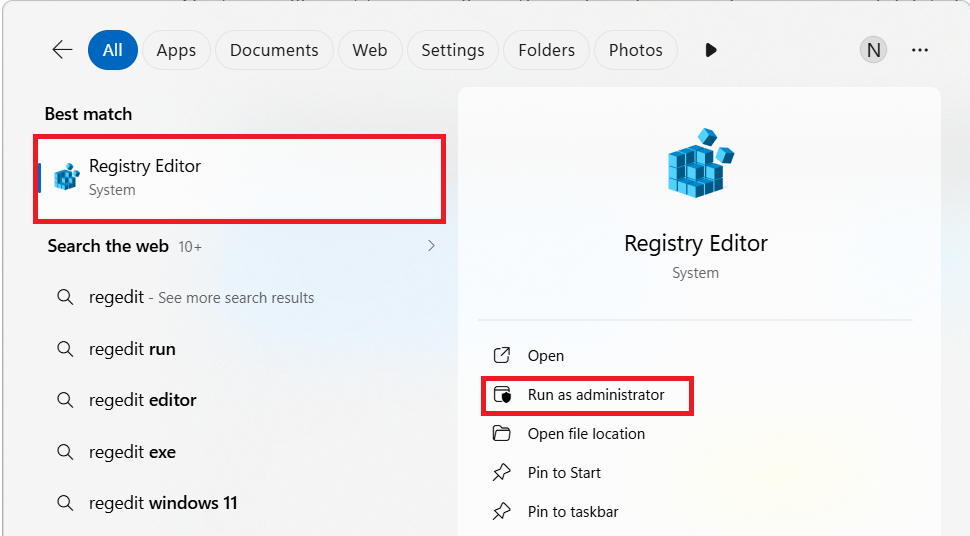
Next, manually remove any remaining SOLIDWORKS registry entries. If you prefer, you can rename the registry keys and delete them later. To open the Windows Registry Editor, type regedit in the Windows search box on the taskbar, then right-click Registry Editor and select Run as administrator.
Note: Editing the Windows Registry can affect your operating system. It is recommended to back up the registry or create a system restore point before making any changes.
6.Delete Entries
Navigate and Delete the following registry entries if they exist:
HKEY_CURRENT_USER\SOFTWARE\SolidWorks
HKEY_CURRENT_USER\SOFTWARE\Dassault Systemes\Composer
HKEY_CURRENT_USER\SOFTWARE\eDrawings
HKEY_CURRENT_USER\SOFTWARE\srac
HKEY_LOCAL_MACHINE\SOFTWARE\SolidWorks
HKEY_LOCAL_MACHINE\SOFTWARE\Dassault Systemes\Composer
HKEY_LOCAL_MACHINE\SOFTWARE\eDrawings
HKEY_LOCAL_MACHINE\SOFTWARE\Srac
HKEY_LOCAL_MACHINE\SOFTWARE\WOW6432Node\SolidWorks
HKEY_LOCAL_MACHINE\SOFTWARE\WOW6432Node\Dassault Systemes\Composer
7.Remove File Locations
Next, manually remove any remaining SOLIDWORKS files and folders. Browse to each of the following locations and delete the folders if they are present:
C:\Program Files\SOLIDWORKS Corp
C:\Program Files (x86)\SOLIDWORKS Corp
C:\Program Files (x86)\SOLIDWORKS PDM
C:\ProgramData\SOLIDWORKS
C:\ProgramData\SOLIDWORKS Electrical
C:\SOLIDWORKS Data
C:\Users\[username]\AppData\Local\SolidWorks
C:\Users\[username]\AppData\Roaming\SOLIDWORKS
